
How to Inspect an Underground Downspout Drain Without Guesswork
 Michael Carter
0 comments
Michael Carter
0 comments
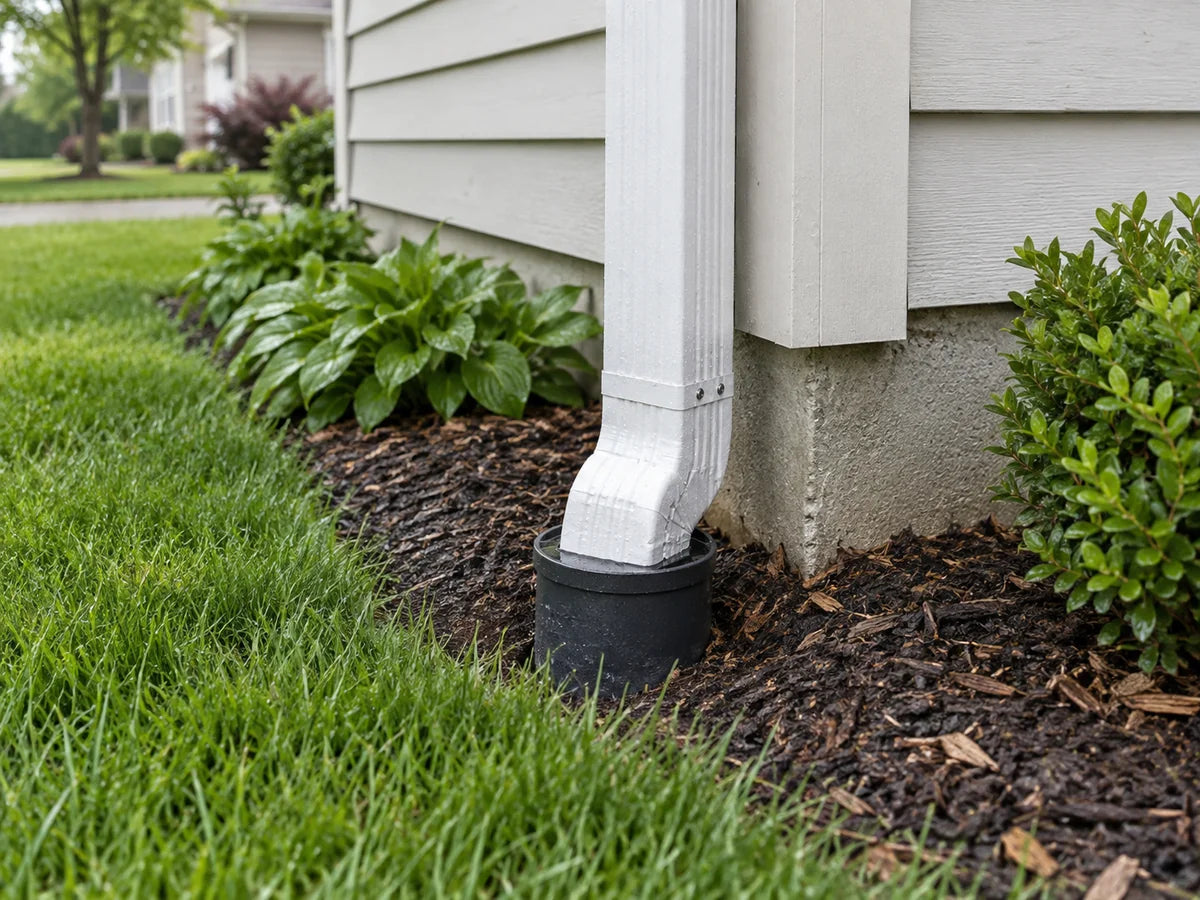
Inspect an underground downspout drain by identifying its accessible inlet and intended outlet, recording what you can see above ground, and deciding whether a pipe camera can answer the remaining question. Keep observations separate from guesses about the buried route. A camera can document the interior it reaches, but it does not clear a blockage or replace a repair assessment. Start with a safe, dry inspection window and stop when access or conditions are uncertain.
A downspout that disappears into the lawn can leave you with a surprisingly basic question: where does the water go? This guide helps you build a useful record before arranging work. It covers private residential roof-drainage lines, not public storm sewers or municipal inspection.
1. Identify the route you actually know
Start by separating the visible downspout from the buried drainage line and its discharge destination. The Building America Solution Center guide describes downspouts carrying roof runoff away from the home through arrangements that can include buried piping and underground catchment. It also warns against connecting roof drainage to a perforated foundation drain. A pipe entering the ground does not tell you which arrangement your property has.
Make a rough sketch of the house and label each downspout with your own simple name, such as “garage corner” or “rear patio.” Add only outlets you can identify from the surface or reliable property records. Draw an uncertain connection as a dotted line and label it “unconfirmed.” The sketch is a working note, not a survey.
Look for installation paperwork, a drainage plan, or information from the previous owner. Ask whether any roof drainage was altered when a patio, extension, or planting bed was installed. Treat recollections as leads to check. If two people give different accounts of the outlet, retain both notes until the route is verified.
For example, your sketch might show a rear downspout and an emitter across the lawn. Write “possible destination” until someone confirms the connection. This small distinction keeps the inspection request honest: you need to establish the route, rather than repair an assumed connection.
↑ Back to top2. Choose a safe inspection window
Use seasonal rain as a reason to prepare, then inspect when the work area is safe. The National Hurricane Center climatology page identifies September 10 as the Atlantic season's climatological peak, with most activity between mid-August and mid-October. That describes the long-term seasonal pattern; it is not a forecast for your yard or a deadline to work during a storm.
The National Weather Service flood guidance tells people not to walk through floodwater and to stay away from water that may be electrically energized. Keep this inspection at ground level on your own property. If you cannot reach the observation point safely, postpone it and follow local weather and emergency instructions.
Before going outside, prepare your phone, existing drainage notes, and a short list of questions. You do not need to start with a ladder, shovel, or powered tool. A useful first visit may simply produce two photographs and a better description of where the problem appears.
If you previously noticed water during rain, record that as a past observation. Do not recreate unsafe conditions to obtain a better photograph. Note the date, where you were standing, and what you could actually see. “Water appeared beside the adapter” is more precise than “the underground pipe failed.”
↑ Back to top3. Check the accessible inlet and outlet
Inspect both visible ends before deciding the buried section needs attention. Drainage installer Todd's Services recommends checking downspout connections and discharge points for damage, secure connections, obstructions, and drainage problems. Its care sheet provides useful maintenance context, but your system's layout still needs confirmation.
At the house, photograph the point where the downspout meets the underground adapter. Record visible gaps, cracks, displaced parts, and debris around the opening. Describe what appears in the photograph without assigning a buried cause. Include a wider view so a contractor can identify the correct corner later.
At an accessible, known discharge point, record its condition and surroundings. Note visible leaf cover, mulch, or soil around it. If no outlet is known, put “outlet not located” in your notes. Do not substitute the nearest yard grate simply because it looks like a possible destination.
Keep the first inspection observational. Do not cut, pry apart, or excavate fittings merely to complete the checklist. If an opening is not designed for straightforward access, ask the installer or a drainage professional how that line should be inspected.
A useful photo sequence is a wide view of the house corner, a close view of the connection, and a separate view of the confirmed outlet. Use the same labels on the photographs and sketch. That makes a later conversation much easier than sending several close-ups without location information.
↑ Back to top4. Record behavior without declaring a diagnosis
Describe when and where water appeared, then list the unanswered questions. Do not turn a single observation into a repair order. For broader context, Powerwill's guide to yard drainage problems after heavy rain can help organize the rest of the property's visible symptoms.
Use the following table as a note-taking aid. These are examples of questions to investigate, not diagnoses or promises about what an inspection will find.
| What you recorded | What to ask next |
|---|---|
| Water appeared beside the inlet | Where did it first emerge, and what connection details are visible? |
| No discharge was observed | Is this the confirmed outlet, and was it observed while water entered? |
| Only one corner showed a problem | Which downspout and outlet belong to that route? |
| The buried route remains unknown | Can records or a professional tracing inspection establish it? |
Record any previous cleaning or drainage work with its date and available invoice. If you have no record, say so. Avoid claims such as “this has always drained perfectly” unless you have enough observation history to support them.
This guide does not prescribe a full-flow hose test. Whether a controlled water test is appropriate depends on access, discharge arrangements, and the current problem. Ask the responsible installer or inspector to explain the proposed test, where water should emerge, and when they will stop it.
↑ Back to top5. Decide what a camera needs to answer
Use a camera for a specific interior question, and ask for the inspection's limits to be documented. Possible requests include recording the accessible run, examining a visible obstruction, or establishing where the camera can and cannot travel. A successful recording is evidence to review; it is not automatically a complete diagnosis of the drainage system.
Before choosing equipment, confirm the access opening, pipe size, bends, and expected route with the inspector or supplier. Ask whether the proposed camera system suits that particular line. Do not assume that a longer reel guarantees access through every fitting or that a camera marketed for sewer inspection will fit every downspout connection.
Powerwill's PW9D1 product page lists a 9-inch IPS monitor and self-leveling camera, with several cable-length and locator configurations. Compare the actual selected configuration against your inspection needs. For a one-time unresolved problem, arranging a suitable professional inspection may be the more practical next step than purchasing equipment first.
Equipment instructions matter. The RIDGID CS65xr operator's manual, for example, warns against forcing equipment and operating while standing in water, and distinguishes electrical equipment from waterproof components. Follow the manual for the system actually being used; that example does not establish a Powerwill system's operating limits.
Ask for the original video, the entry point, the inspection direction, and notes identifying where useful visibility ends. If the operator reports a distance, ask what reference point and measuring method it uses. Do not turn a cable reading into a marked excavation location without a separate location assessment.
For example, a report might state “inspection stopped at a bend; downstream section not viewed.” Keep that limitation with the recording. It would be misleading to summarize the same result as “the entire pipe is clear” or “the pipe must be replaced.” Ask the inspector what additional evidence would distinguish the possible explanations.
↑ Back to top6. Build a clear professional handoff
Send the observations, the unanswered question, and the inspection evidence together. Request a scope of work that explains what will be checked before it proposes repair. The aim is to help the next person understand the case without repeating assumptions as facts.
- Identify the downspout by house location and attach the labeled sketch.
- Include dated inlet and outlet photographs, with uncertain connections clearly marked.
- Describe the reported behavior and any previous maintenance.
- Attach camera footage and the inspector's stated limits, if available.
- Ask what evidence supports the proposed next step and how its result will be checked.
If excavation becomes part of the proposal, include utility-location planning before ground disturbance. Alabama 811 explains the national 811 notification process and notes that private facilities may need separate locating. Use your own state's 811 center for the applicable procedure. A drainage-camera location does not replace utility marking.
↑ Back to topKey Takeaways
- Label the inlet, confirmed outlet, and uncertain route separately before requesting work.
- Choose a safe inspection window instead of working through storm or flood conditions.
- Photograph accessible connections and discharge points before assuming a buried defect.
- Request camera footage with entry-point information and clear inspection limitations.
- Use documented findings to discuss next steps, including location planning if digging is proposed.
Frequently Asked Questions
How do I find where my underground downspout drain ends?
Start with property records and accessible surface features, then ask the installer or a drainage inspector to verify the connection. Mark a suspected outlet as unconfirmed. A nearby emitter alone does not establish your buried route.
Does water beside the downspout prove the buried pipe is clogged?
No. Record where water appeared and what the visible connection looked like, then request an assessment. That observation alone does not establish the condition of the entire underground line.
Can a Powerwill camera clear the drain?
No. Powerwill pipe cameras are for inspection and documentation. Clearing an obstruction or repairing a damaged line is separate work; do not use the camera as a clearing tool.
Which Powerwill configuration should I choose?
Choose only after checking your access, pipe dimensions, route, and inspection objective against the current model information. Verify the selected cable and locator package rather than relying on a model name alone. Ask for compatibility help if any of those details are unknown.
What should I ask for after a camera inspection?
Ask for the video, entry point, direction, distance reference, findings, and sections that could not be inspected. Request a separate explanation of how those findings support the next proposed action.
Inspect Before Repair
Begin with a labeled route sketch and a short observation record. Where uncertainty remains, ask for an inspection designed to answer that question before choosing cleaning, alteration, or repair.
For wider preparation, use the Powerwill pre-rain inspection checklist. If ongoing inspection is part of your maintenance plan, compare current PW9D1 configurations with your confirmed access requirements.
↑ Back to topSources
- National Hurricane Center: Tropical Cyclone Climatology
- Building America Solution Center: Gutters and Downspouts
- National Weather Service: During a Flood
- Todd's Services: Underground Downspout Drainage System Care Sheet
- RIDGID: CS65xr Operator's Manual
- Alabama 811: Contact 811 Before You Dig
- Powerwill: PW9D1 Product Information
Comments
No comments